Build A Home Espresso Teardown Instagram Account With An AI Character: A Step By Step Guide
FLB Studio
May 12, 20268 min read
This guide shows how to build an Instagram account focused on home espresso machine repairs, mods, and teardowns using Flying Bears Talent, with cross-posts to X for repair threads. The face is one recurring AI character; the content is teardown sequences, mod tutorials, and before-and-after machine shots. The example character is Daniel, an engineer-coded man in his thirties with rolled-up sleeves, glasses, and the methodical workshop presence of someone who actually rebuilds machines. By the end of the guide you will have Daniel locked in, a wardrobe and workshop location set, a first teardown post with a real machine as the product, and a one-session weekly cadence. You need a laptop, photos of an actual machine and its laid-out parts, and roughly two hours for the first run.
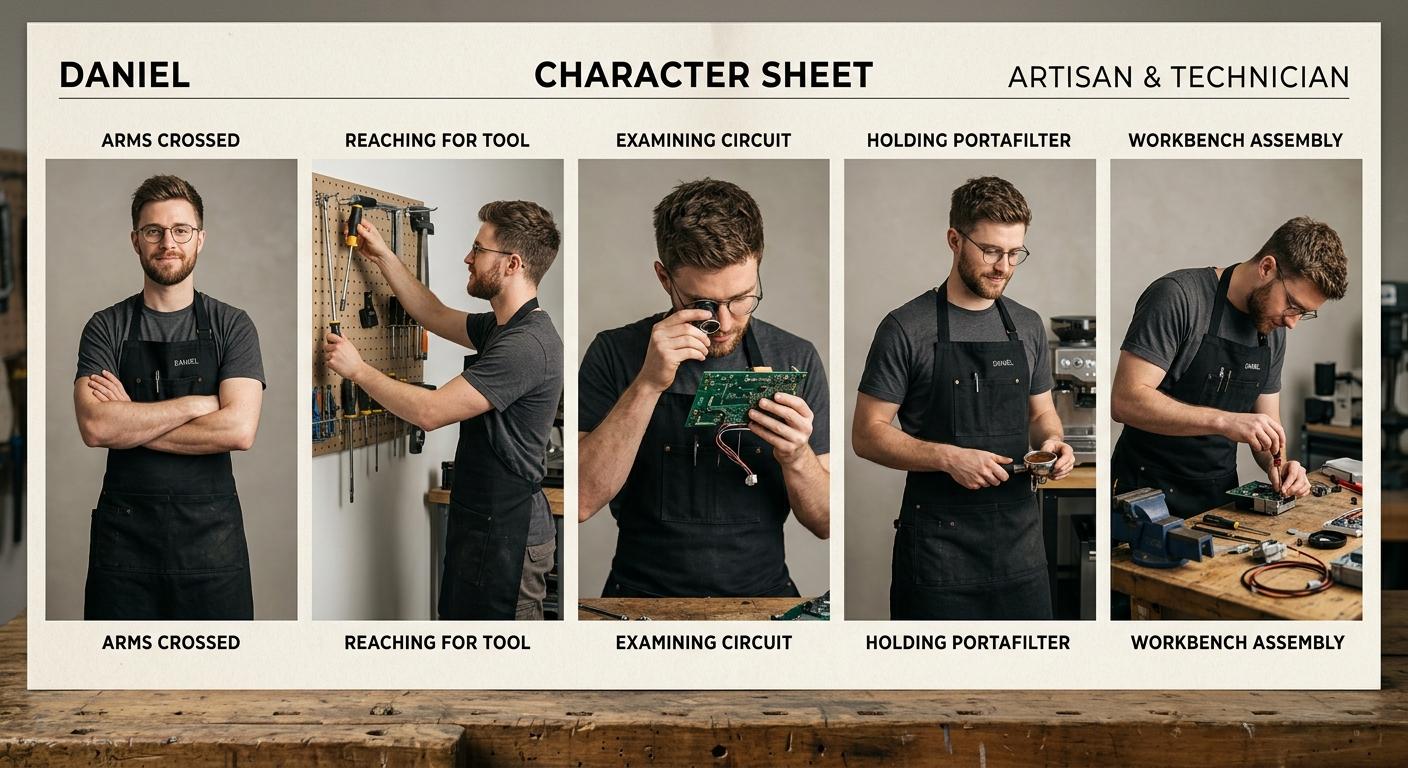
Step 1: Create the character. Open the new character form and enter the traits. For Daniel: name "Daniel", early to mid thirties, heritage that fits your audience, vibe "methodical, calm, quietly enjoying the puzzle", style "technical t-shirts in dark tones, a black workshop apron, dark trousers, rolled-up sleeves, simple wire-frame glasses". Add a note that the glasses and a black workshop apron are the locked signatures. Save, then generate the four additional canonical poses. Check each pose: glasses present, apron present in working poses, age and face consistent across the five references. Regenerate any pose where the glasses disappear or he looks markedly younger. The reasoning behind a locked identity is on the Flying Bears Talent.AI landing page.
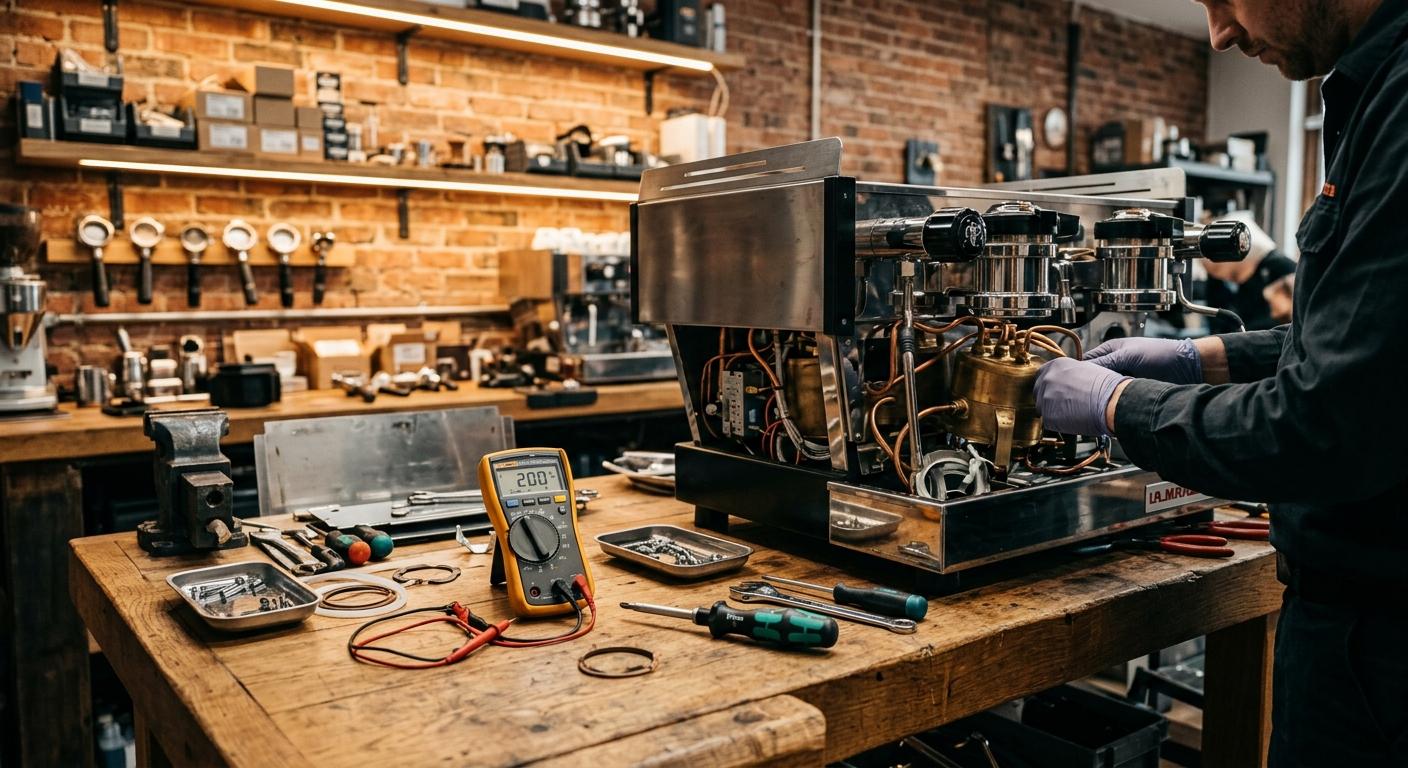
Step 2: Build the wardrobe and lock the location. In the wardrobe section, upload one photo per piece. Start with five items: a black workshop apron (full outfit, signature), two dark technical tees (top), dark trousers (bottom), and wire-frame glasses (accessory, signature). For the location, use the location input in describe mode: "a workshop with a heavy wooden bench, machine internals laid out on a clean cotton cloth, a torque screwdriver and a multimeter to the side, a coiled water hose, warm overhead task lighting, exposed brick wall behind". If you have a reference photo of a workspace you admire (with rights to use), upload it in upload mode. Enable grounding so the model pulls real-world workshop references for tools, layout, and warm task light.
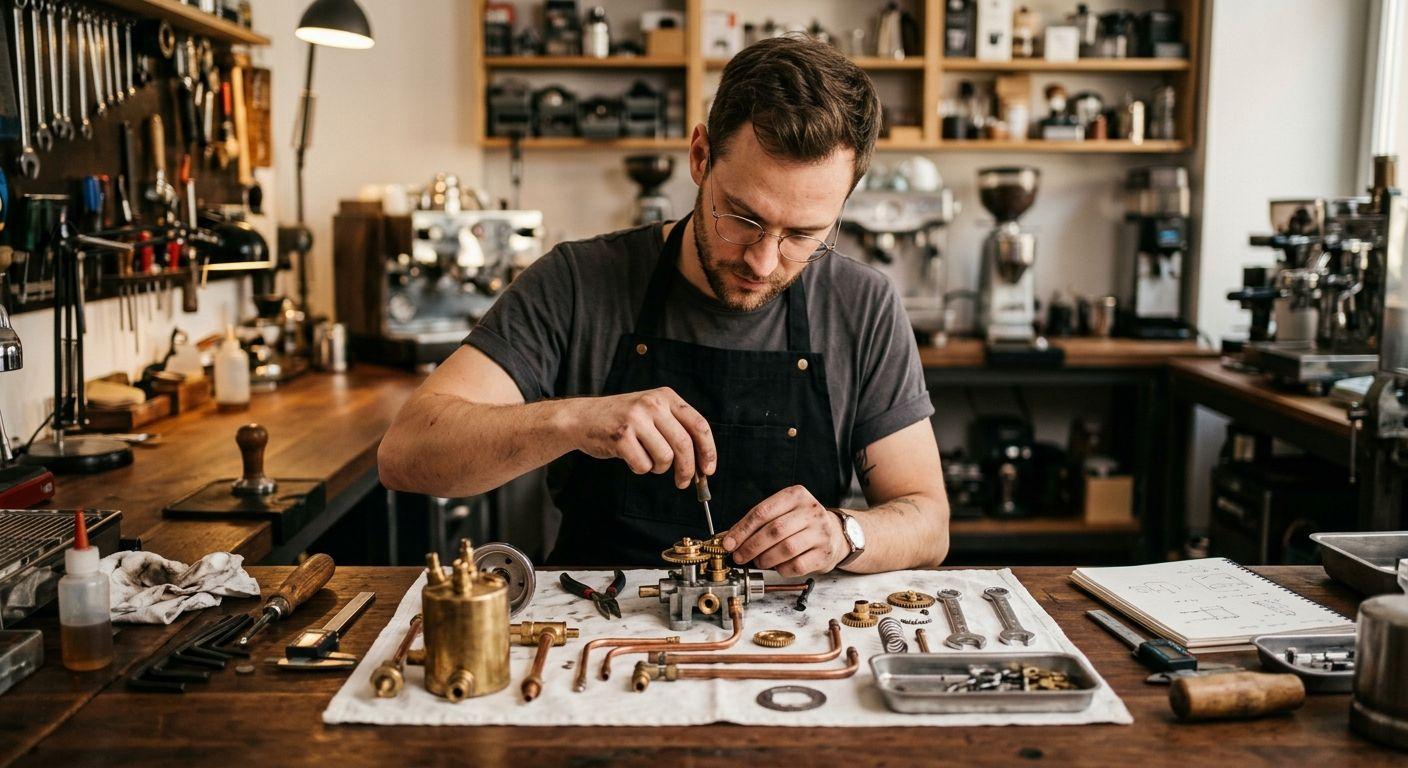
Step 3: Generate the first teardown post with a real machine. Open the new post form. Attach Daniel, select the workshop apron, and upload a product image: an overhead photo of the actual machine you are tearing down, plus (if your platform allows a second product image) a wide shot of the laid-out parts on the cotton cloth. The product images are what the model anchors on, so use the real machine, not a press shot. Scene description: "Daniel leans over the workbench inspecting the disassembled group head, parts laid out on a cotton cloth, torque screwdriver in hand, warm overhead task light, shallow depth of field on the parts in foreground". Camera angle: high angle. Lighting: warm task lighting. Composition: rule of thirds. Aspect ratio: 4:5 for Instagram. Generate, then review: machine parts believable and matching your reference, apron present, glasses present, Daniel recognisable. Tighten the scene description and regenerate if anything drifts.
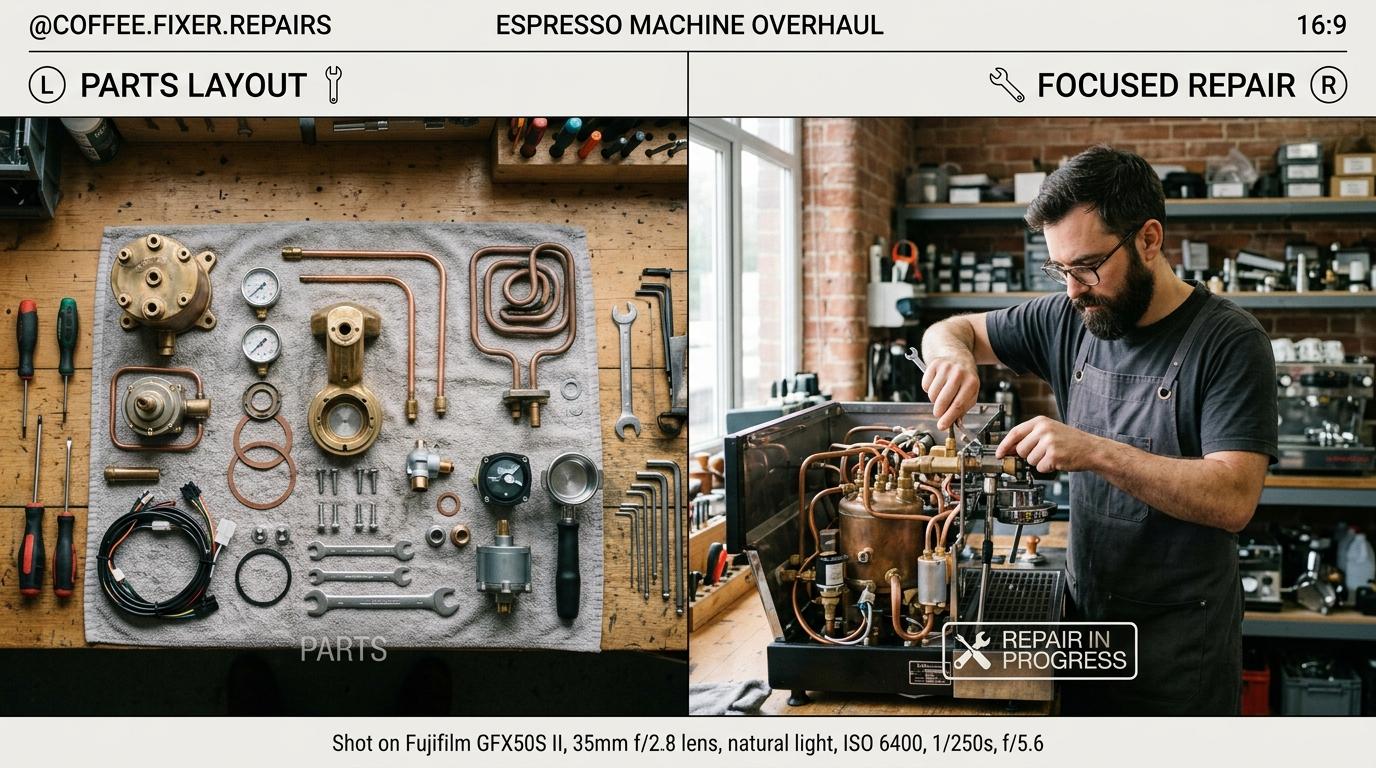
Step 4: Batch four teardown content types per session. Hold Daniel and the apron constant, then rotate four recurring frames per machine. Frame one: overhead parts array on the cotton cloth (1:1, top down, no character, the visual signature of the account). Frame two: hands-on close-up of a single component (4:5, high angle, Daniel's hand with the part). Frame three: before-and-after comparison cards (4:5, side by side, dirty vs cleaned, used as a carousel slide). Frame four: Daniel at the workbench wide shot (16:9, medium shot, for the X header or quote-card background). One machine per week, four images per machine, with extra slides for multi-step repairs. Before publishing, open the Instagram and X preview cards on each post. For captions, write the actual repair steps yourself (torque values, part numbers, gasket sizes); auto-caption is only for the lifestyle framing. The supported aspect ratios are on the FAQ page.
Step 5: Set a posting cadence and stay safe with electricals. A realistic weekly rhythm is one machine per week with three Instagram posts and one matching X thread: Monday (overhead parts array on Instagram, full repair thread on X), Wednesday (hands-on close-up of the trickiest step, single image both platforms), Friday (before-and-after with shot-pull test, single image). One batch session covers it. Always note safety steps in the caption (unplug the machine, depressurise the boiler, discharge capacitors where relevant) and link to a manual or service guide rather than inventing torque values. Avoid claiming any specific machine is "fixed" without a test pull; show the espresso shot in the closing post. When you are ready to add video teardown clips or B-roll, our monthly plans and credit packs show which tier matches the throughput.
The pattern is small and repeatable: one engineer with locked signatures (glasses plus black apron), one workshop bench, one real machine per week as the product anchor, four recurring frames per machine, batched weekly with safety-first captions. Done consistently for a month, you will have a coherent Instagram repair feed plus parallel X repair threads that read as a real working bench. The character does not change, the workshop does not change, and the machines are always real, with real part numbers and real test pulls. That is what separates an espresso repair account that other owners trust from an AI feed of clean-looking renders and vague hand-waving.